
Local Installation
Contents
2.3. Local Installation#
2.3.1. Installation#
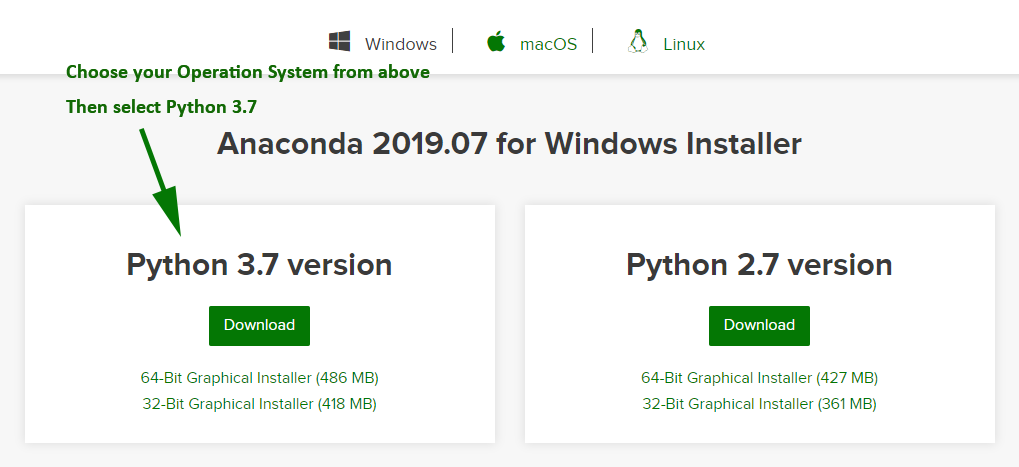
Visit continuum.io and download the Anaconda Python distribution for your operating system (Windows/Mac OS/Linux).
Be sure to download the Python 3.X (where X is some number greater than or equal to 7) version, not the 2.7 version.
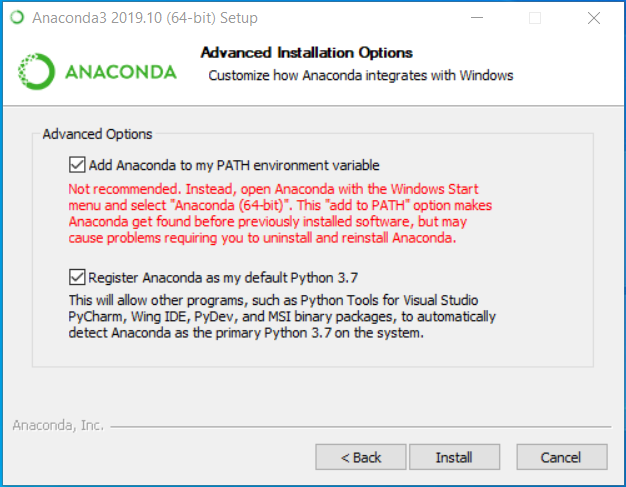
Make sure that during the installation Anaconda is added to your environment/path.
On Mac OS and Linux, this should happen by default.
For Windows users, we recommend installing for “just me” instead of “all users”. Windows users will need to check the upper box when the page shown below appears (disregard the “not recommended” warning from Anaconda).
2.3.2. Downloading the Quantitative investing notebooks#
You have three options here
Download notebook by notebook as you use it. You can do that by clicking on the top right download buttom and selecting the
ipynboption. You shoudl try doing this right now with this notebook. This is the simplest but some of the figures that you can see on the web will not render if you follow this method.Download everything at once: You can go in the top right and click on the button on the left of the download buttom (it looks like a cat). This is the github buttom, you can hover and choose the repository option. You then hover on the green buttom on the top right that says “code” and you should select the option “download ZIP”. You then unzip the folders in your working folder. All notebooks will be in chapters. You can delete everything else exept folders “assets” and “chapters”. Assets contains the figures that do not rended in method 1
Use Github! If you know how to do this or want to learn that is the most efficient. But it can be a bit overwhelming if you are startign to code now!
Updating: If I change anything in the notebooks after you download?
If you followed step 1 or 2 you cna jsut download again the indivudal notebook manually
If you follow step 3 you can use gihthub to handle this!
2.3.3. Package Management#
In addition to Jupyter, the Anaconda Python distribution comes with two package management tools conda and pip.
These will help you ensure that you have the right packages (think of these as “add-ons” to Python that give you additional functionality… We will discuss these more in depth later!) and help you keep them all up to date.
We will work through an example below to install some new package functionality needed for some
later lectures. Generally, packages can be installed by using conda install <package name> or
pip install <package name>.
Please install the packages you will need later by following the instructions below for your computer’s operating system.
Linux/Mac
Open a terminal.
Windows
Type “cmd” in the search box to locate the Anaconda command prompt icon.
Right click on the icon “Anaconda Prompt” and choose “Run as administrator”
Run the following commands line by line (meaning you type the first command on the prompt and presse ‘Enter’ then write the next line and so on)
conda create -n fin418 python=3.8 matplotlib scikit-learn scipy pandas numpy statsmodels psycopg2
conda activate fin418
pip install fredapi wrds datascience pandas-datareader
conda install -c conda-forge jupyterlab
NOTE: for some people 3.8 does not work and lead to error. If you encounter installation errors, try to change the first line above to
conda create -n fin418 python=3.6 matplotlib scikit-learn scipy pandas numpy statsmodels psycopg2
Press y and enter whenever you see Proceed [y]/n from your terminal.
Close the command window after the installation finishes, log out of Windows, and then log in.
If you are told that you are missing a package at any point in time, we recommend trying to install
the package with conda first and, if that doesn’t work, installing with pip.
You can update a package by running:
conda update <package name>for condapip install <package name> --upgradefor pip
2.3.4. Starting Jupyter#
Start JupyterLab by following these steps:
Type “cmd” in the search box to locate the command prompt icon.
click on the icon “Anaconda Prompt” (fconda install -c conda-forge jupyter_contrib_nbextensions ipywidgetsr MAC\LINUX just open terminal)
Change directory to the folder containing the course material. For example:
cd “C:\Users\Alan\Dropbox\Projects\Teaching\2021”
Type: conda activate fin418
Launch jupyter by executing the command:
jupyter lab
If a web browser doesn’t open by default, look at the terminal text and find something that looks like:
Copy/paste this URL into your browser when you connect for the first time,
to login with a token:
    http://localhost:8888/?token=9a39d3741a4f0b200c6e4b07d8e5c04a089899cddc72e7f8
and copy/paste the line starting with http:// into your web browser.
Note
The terminal you opened must stay open while you are editing the notebooks.
2.3.4.1. Opening a Jupyter Notebook#
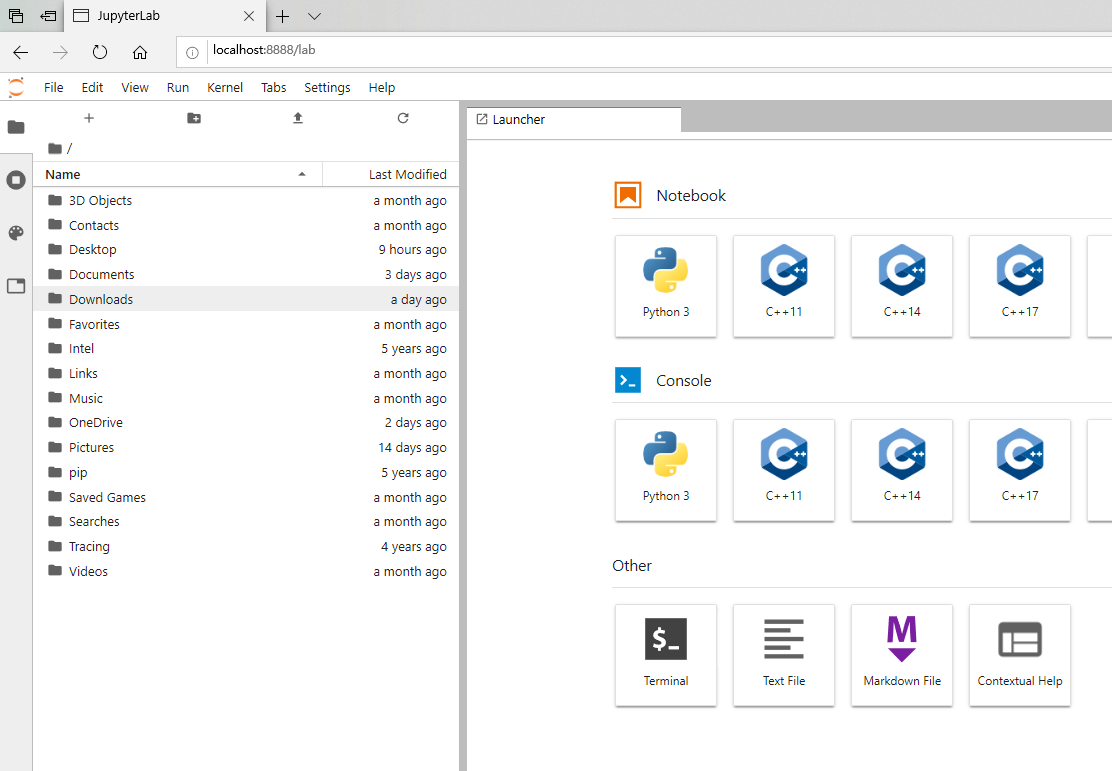
Once the web browser is open, you should see the JupyterLab dashboard. You can open a new Jupyter notebook by clicking Python 3 when you see something like the following image in your browser:
Once the notebook is open, you should something similar to the following image:
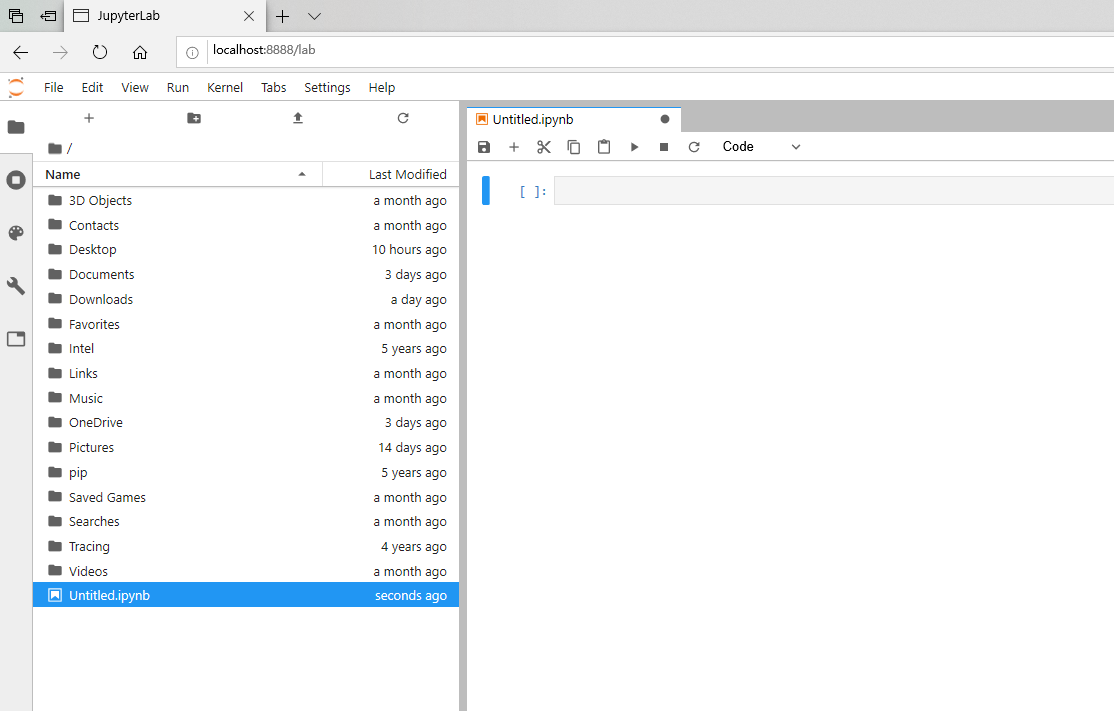
Note that:
The filenames on the left will be different.
It should list the contents of your personal home directory (folder).